In This post i will help you to create new QnAMaker service by registering a cognitive service from azure and then creating a new knowledge base in qna maker using the registered cognitive service. And also if you are migrating from old QnAMaker (which you are using as a dialog in microsoft bot framework) to new QnAMaker you need to do certain changes in you code to make it work otherwise you may find 400 error or 404 error etc.
So lets register a new QnA cognitive service from azure portal first.
In order to do that you need to go to the Azure Portal and then search for QnAMaker service and there you can see the detail about QnAMaker service.

Or for a shortcut you can directly go here to register QnAMaker service.
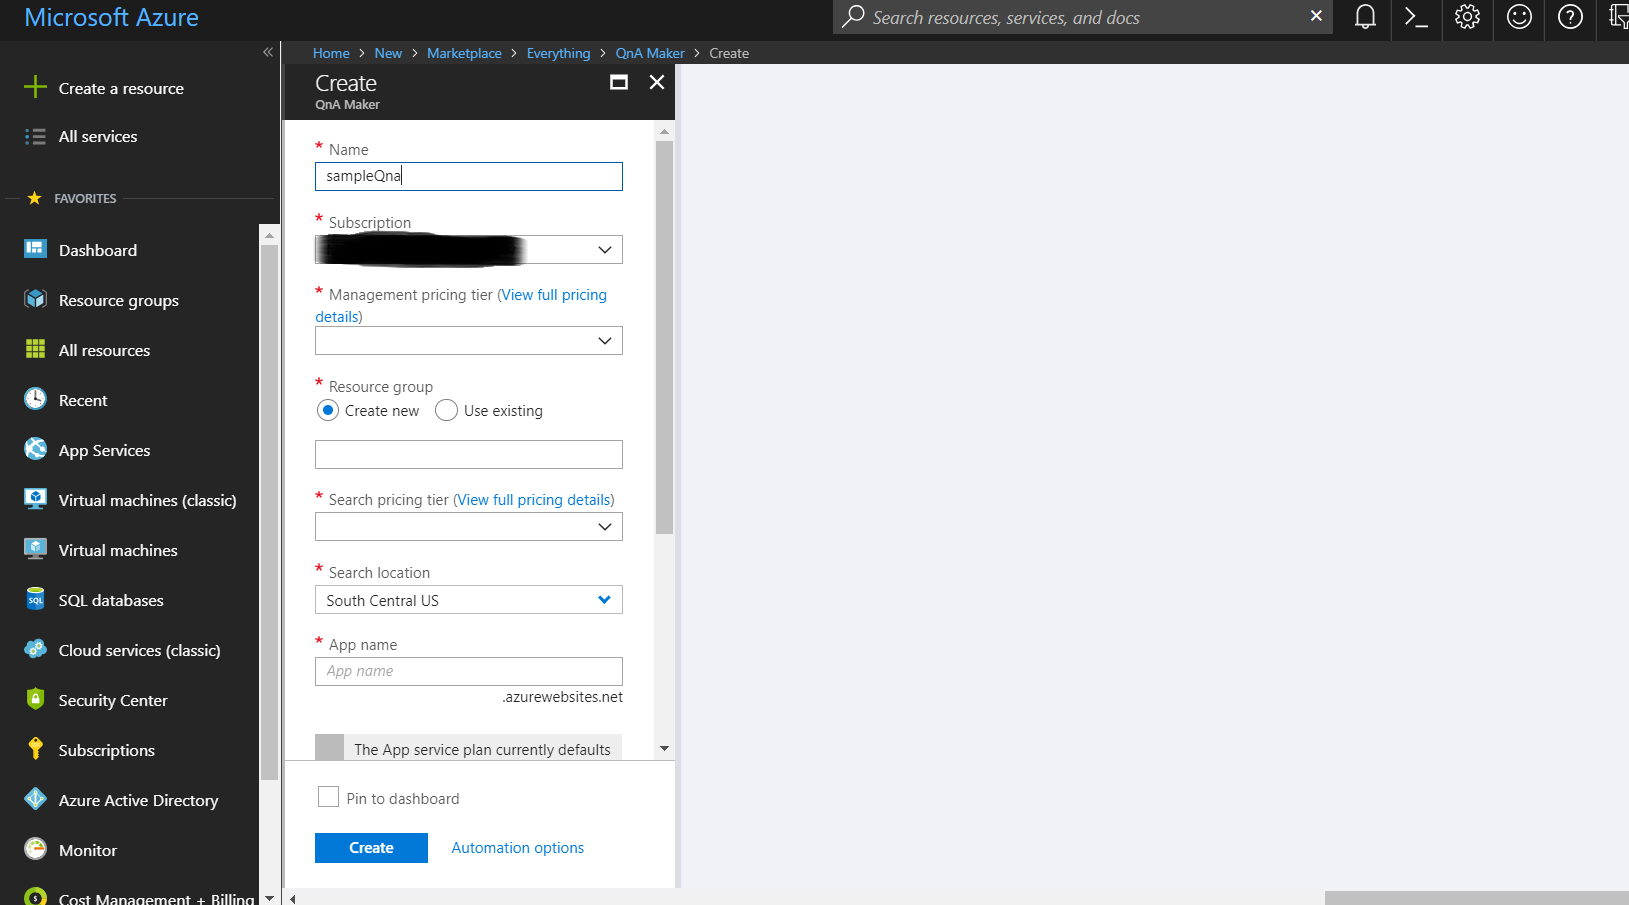
Then you need to fill the necessary details like name, subscription etc.
Now you need to go to the qnamaker.io in order to create a new knowledgebase. There you need to sign in with the same account as you have there in azure portal.

Now, in STEP2 you fill the detail and then you can give you QnA name and then you can populate your Knowledge base by either giving any faq link where you have the question and answer like this QnAMaker FAQ or even you can use file to populate your knowledge base.

These details you can find here.
Now in orde to use in code with bot framework you need to get the publishing detail which you will get when you will publish you QnAMaker service.
that will look like this
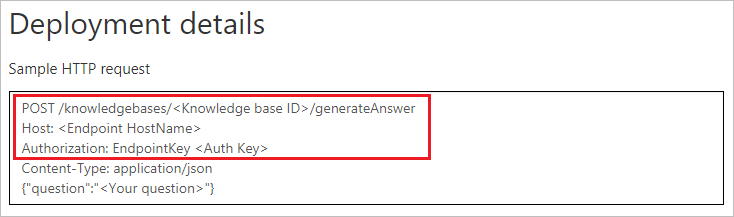
From publish detail you need ‘Knowledge base id’, ‘Endpoint hostname’, and ‘AUth key’.
Now in code i am calling my QnADialog whenever i am getting ‘None’ intent from LUIS service.
using System.Threading.Tasks;
using Microsoft.Bot.Builder.Dialogs;
using Microsoft.Bot.Connector;
using Microsoft.Bot.Builder.Luis;
using Microsoft.Bot.Builder.Luis.Models;
using System.Threading;
namespace Test
	{
		[LuisModel("modelID", "SubscriptionKey")]
		[Serializable]
		public class RootDialog : LuisDialog<object>
		{
			[LuisIntent("None")]
			public async Task NoneRes(IDialogContext context, LuisResult result)
			{
					var qnadialog = new QnADialog();
					await context.Forward(new QnADialog(), AfterQnADialog, context.Activity, CancellationToken.None);
			}
			private async Task AfterQnADialog(IDialogContext context, IAwaitable<object> result)
			{
				context.Wait(MessageReceived);
			}
		}
	}
For QnADialog you need to install a Nuget Package - ‘Microsoft.Bot.Builder.CognitiveServices.QnAMaker’
QnADialog will look like this..
using Microsoft.Bot.Builder.CognitiveServices.QnAMaker;
namespace Test.Qna
{
    [Serializable]
    [QnAMaker(authKey: "AuthKey", knowledgebaseId: "KnowledgebaseId", defaultMessage: "please rephrase, I could not understand.", scoreThreshold: 0.5, top: 1, endpointHostName: "https://yourAccount.azurewebsites.net/qnamaker")]
    public class QnADialog : QnAMakerDialog
	{}
}
If you are using Node js then for the new qnamaker to work you need to add settings like this.
Assuming you have installed all the packages required and have the files in place.
App.js
var restify = require('restify');
var builder = require('botbuilder');
var cognitiveservices = require('../lib/botbuilder-cognitiveservices');

// Setup Restify Server
var server = restify.createServer();
server.listen(process.env.port || process.env.PORT || 3978, function () {
    console.log('%s listening to %s', server.name, server.url);
});

var connector = new builder.ChatConnector({
    appId: process.env.MICROSOFT_APP_ID,
    appPassword: process.env.MICROSOFT_APP_PASSWORD
});
var bot = new builder.UniversalBot(connector);
bot.set('storage', new builder.MemoryBotStorage());
server.post('/api/messages', connector.listen());

var recognizer = new cognitiveservices.QnAMakerRecognizer({
    knowledgeBaseId: '5abcde-cbfb-4yuio-92c5-052d3a806e78',
    authKey: 'eb7uy78y-8a64-4e75-98uj-7f89987b67bc',
    endpointHostName: 'https://name.azurewebsites.net/qnamaker'
    });

var basicQnAMakerDialog = new cognitiveservices.QnAMakerDialog({
    recognizers: [recognizer],
    defaultMessage: 'No match! Try changing the query terms!',
    qnaThreshold: 0.3
});

bot.dialog('/', basicQnAMakerDialog);
In the above code you can see that in recognizer we need to add the endPointHostName also along with KBID and Authkey.
You will get this endPointHostName, KBID and Authkey at the time of publishing the qnamaker service.
Done, now whenever you will get ‘None’ intent from LUIS your QnADialog will respond for the question.
- qnamaker (1) ,
- qnamaker with botframework (1) ,
- qnamaker when none intent (1) ,
- 404 error in qnamaker (1) ,
- new qnamaker (1) ,
- migrating to new qnamaker (1)