Here we will learn how to configure asp .net web application with Jenkins for continuous integration and continuous deployment.
In the first part we will integrate Jenkins with Git/GitLabs to pull out the code each time a change is pushed, will build it and will send the build status via email notifications.
In second part, on successful build we will publish the results and deploy them to Microsoft Azure using FTP (File Transfer Protocol).
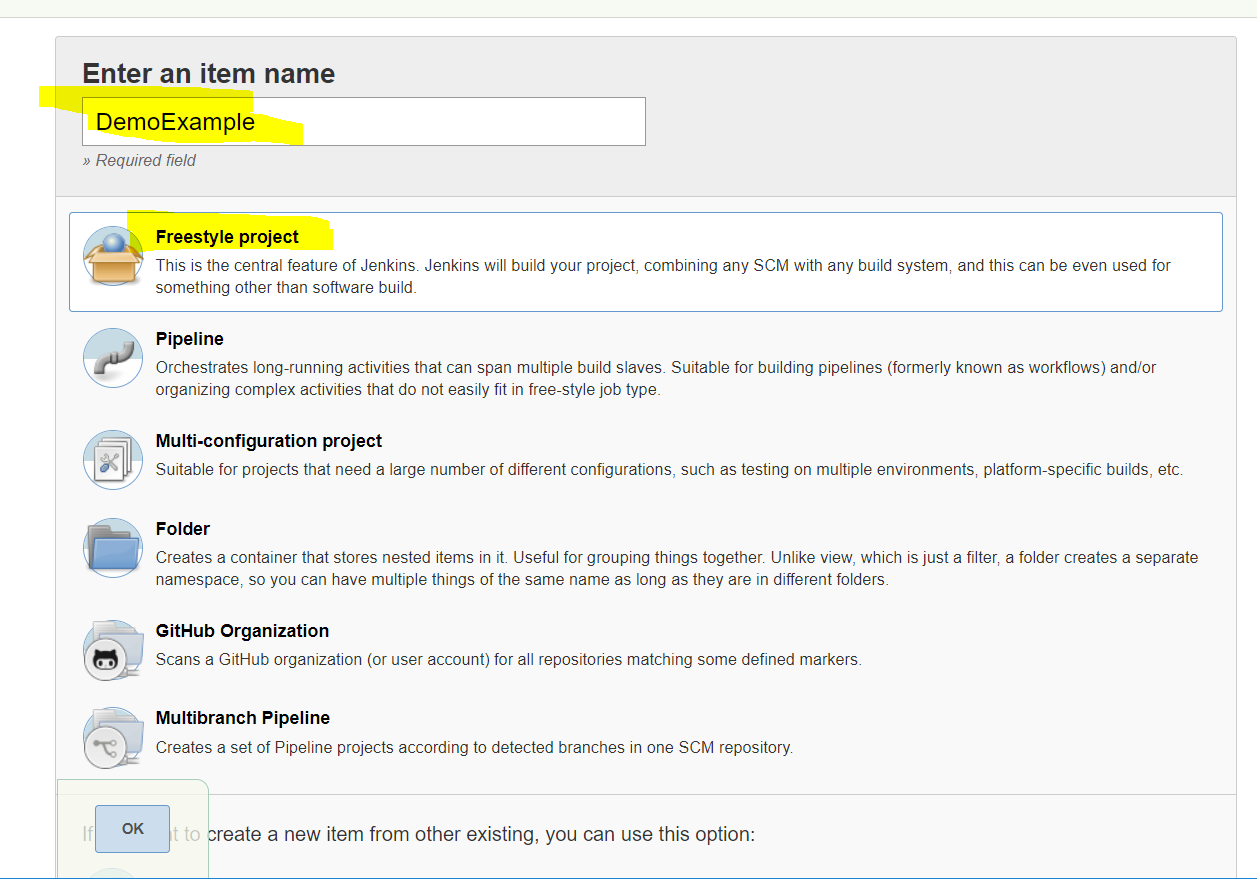
1. Go to Jenkins Home Page, login to Jenkins if you are not logged in and on the left hand side menu click on New Item, give relevant name and select Freestyle project and then click Ok.
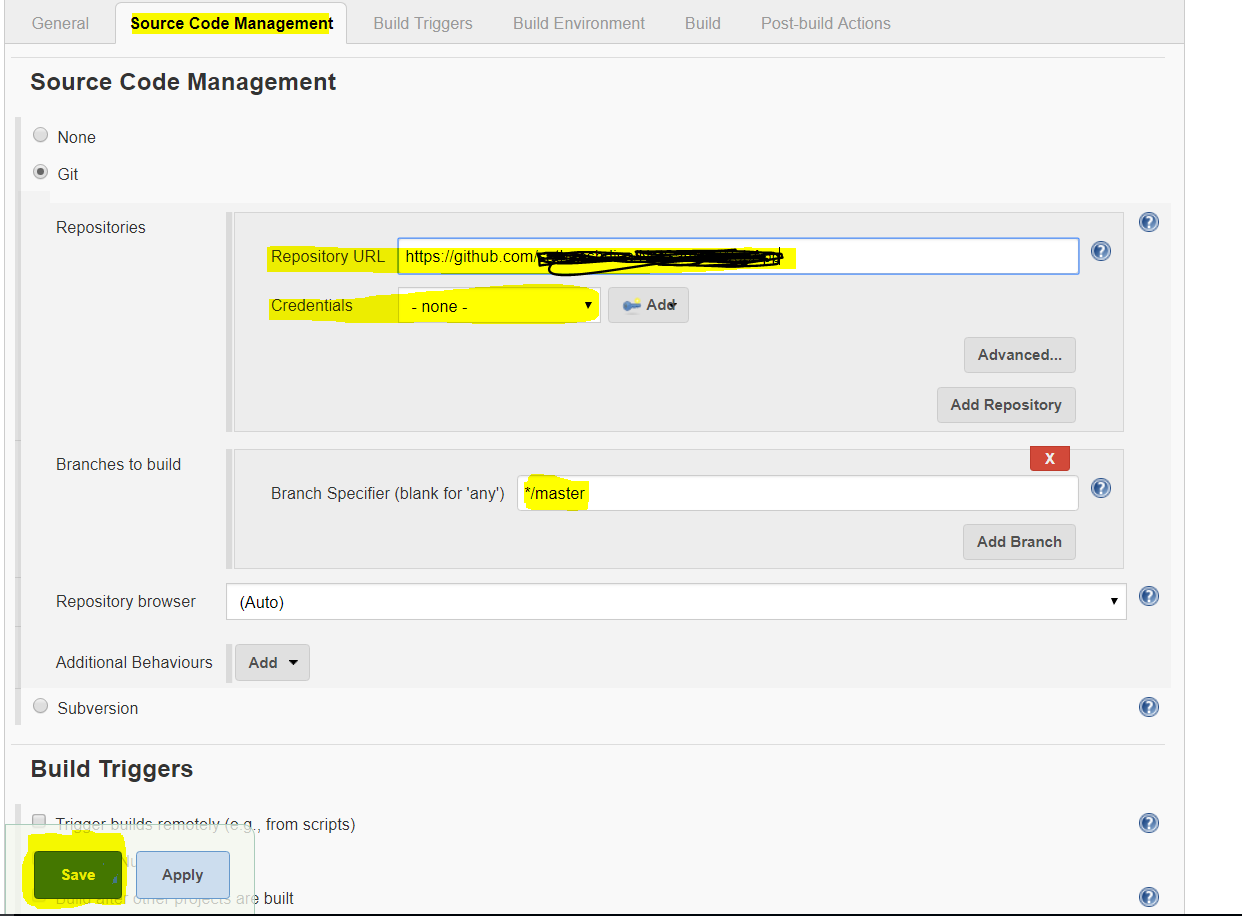
2. Next step is to Configure Source Control(Git/GitLabs), for this click on Source Code Management under that click on Git
(Public Git Repo)
- · Give the public repository URL in the Repository URL filed
- · leave the credentials to none (because repo is public)
- · Branch specifier: specify the branch where you want Jenkins to look in for changes and then click Save.
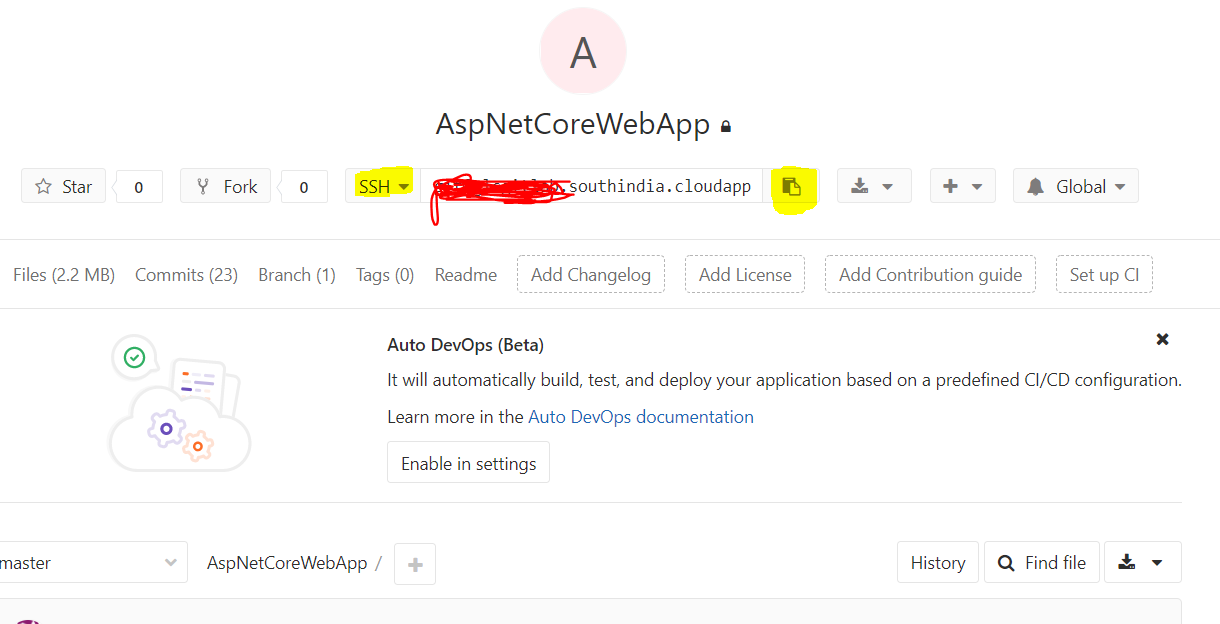
(Private Git repo)
- · Configure SSH as mentioned in the previous documents (Jenkins AspDotNet Setup)
- · Go to your Git hub/ GitLab private repository page and copy the repository url as shown below
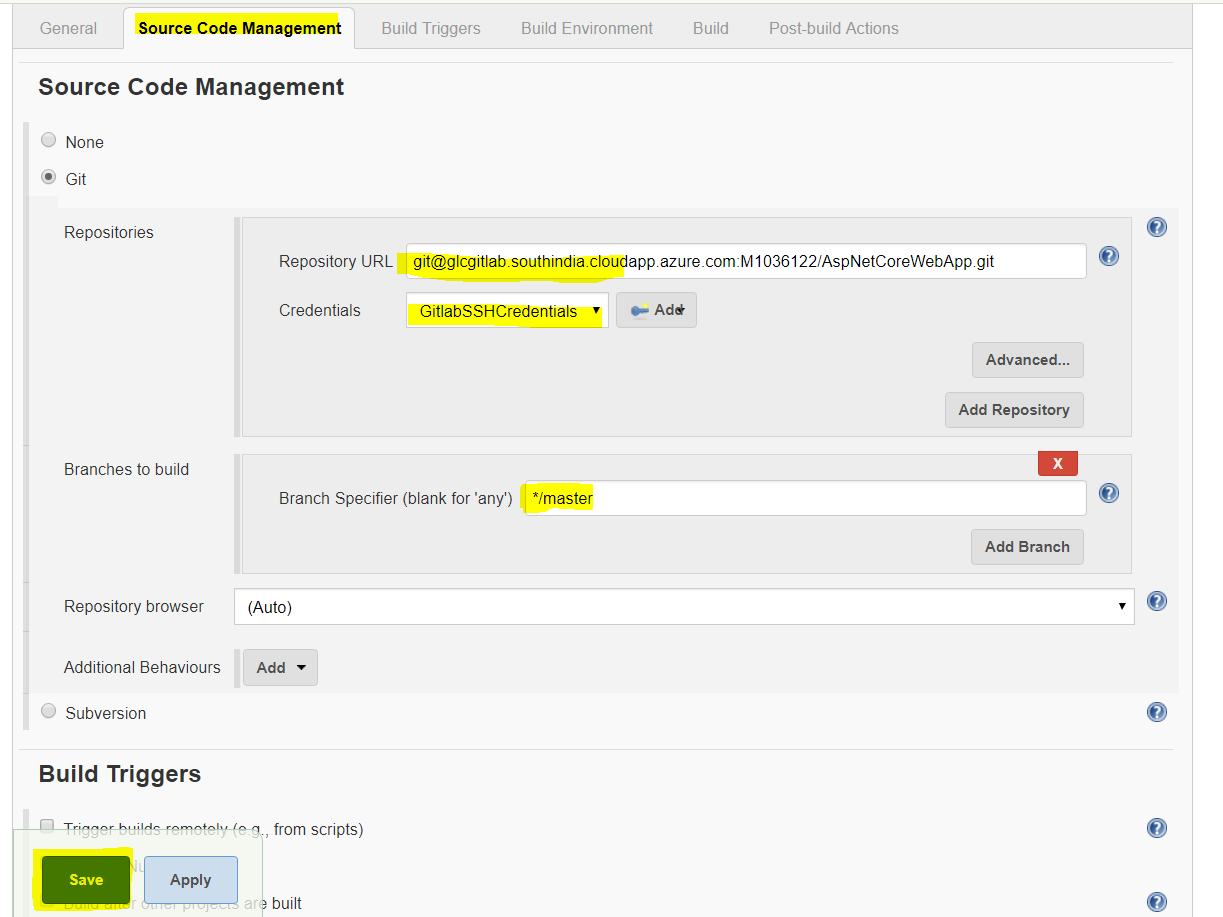
- · Paste the URL in the Repository URL section of Source Control Management as explained above.
- · Select the credentials from the dropdown
- · Select the Branch and then Click Save.
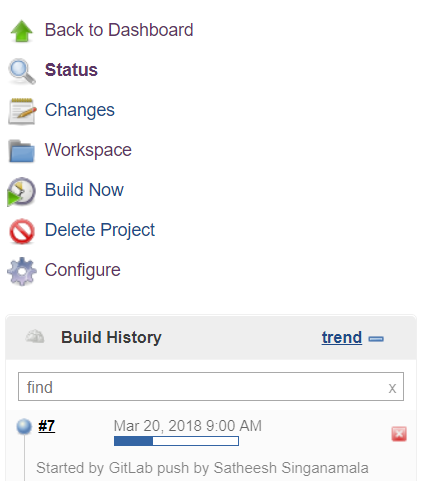
3. Now click on Build Now options from right pane to check whether Jenkins is able to get the code from repository.
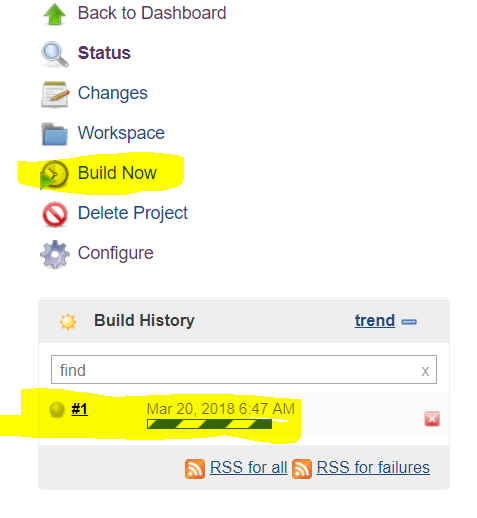
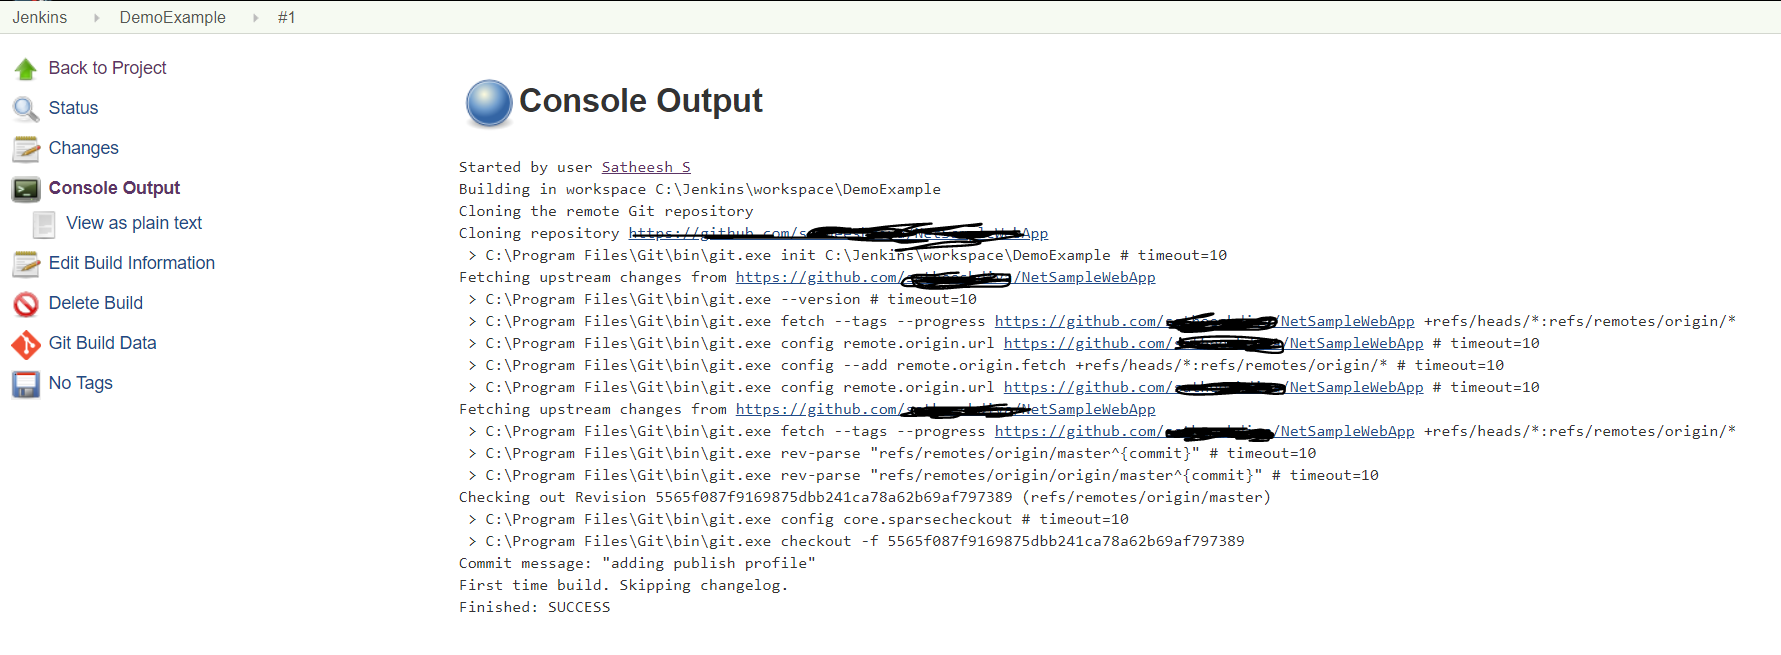
Above screenshot shows the clone results, you need ensure that status is SUCCESS.
Once you click on Build now, Jenkins try to connect to the specified repository on successful connection it clones into Jenkins local workspace. You can check that by clicking on Workspace on Jenkins Project Homepage.
4. Next step is configure build triggers, if you want to continuously build whenever a change is pushed to repo then configure this step else you can this step and jump to Step 4.
(Note to do this Jenkins must hosted under some Web Server otherwise GitHub won’t be able to trigger an event to Jenkins)
Now go back to Configure Project and click on Build Trigger
-
· Select Build when a change is pushed to GitLab
(If you are not able to see the above option then go to manage plugins and install Gitlab Hook Plugin and restart the Jenkins)
-
· Then click on Advanced, scroll down and click on Generate which generates the unique token for this project, please copy the unique token
And copy the URL as highlighted in the below image
(Note URL as shown in below image is localhost but it must be URL of Jenkins where it is hosted )

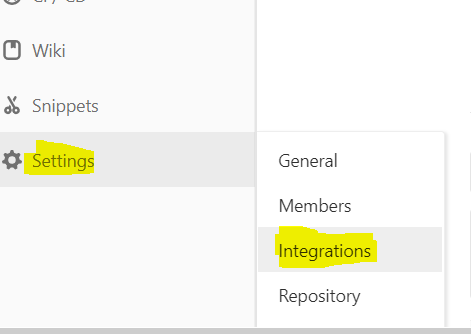
- · Now go to GitHub private repo and hover on Settings present in left pane and click on Integration
-
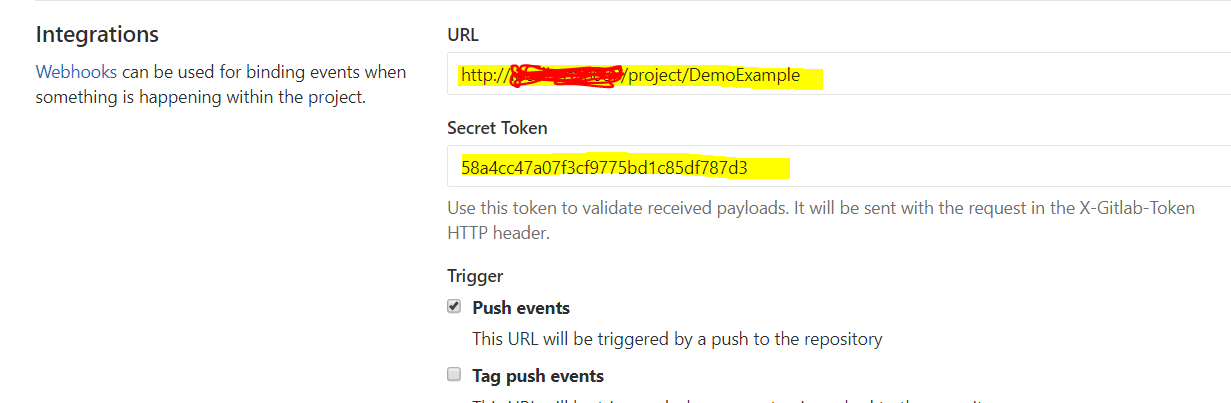
Paste the Url and token which copied from previous steps
And configure the events (Push events), check the Enable SSL Verification if your Jenkins is having an SSL certificate else you can uncheck the option and click Add Webhook.
- You can check the configuration by making some change in the code and pushing and in Jenkins it queues new the build automatically as follows
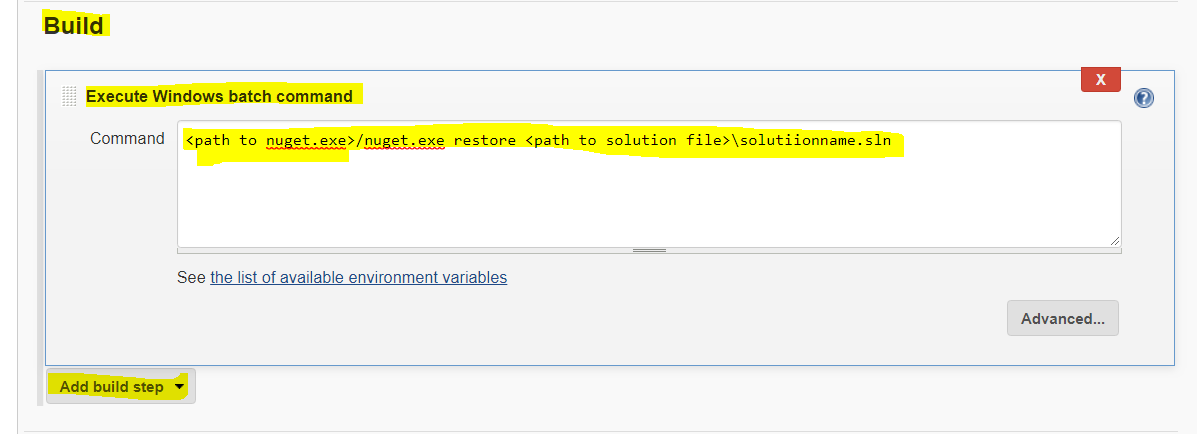
5. Next step to Build the cloned code, before we do build the code we need to restore the packages to do that
- From configure project page click on Build and then click on Add Build Step and select Windows Command Prompt And add the command shown in below image
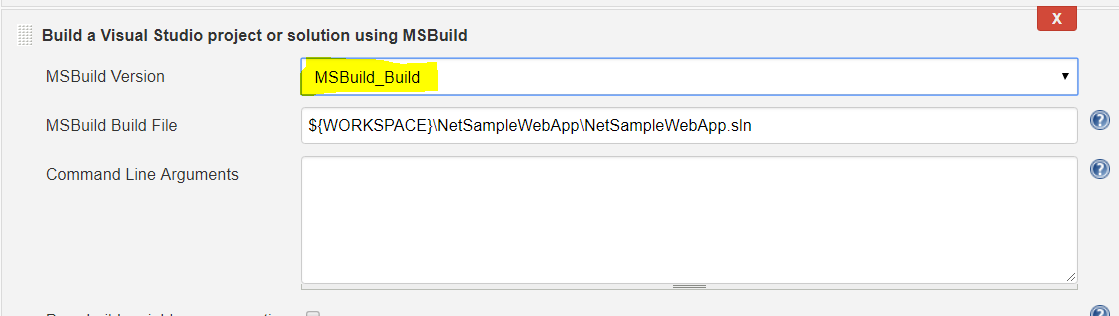
- Next is to add the build step for that click on Add build step and select Build a visual studio project or solution using MSBUILD.
MSBuild Version: Select MSBuild_Build if you just want to build the solution
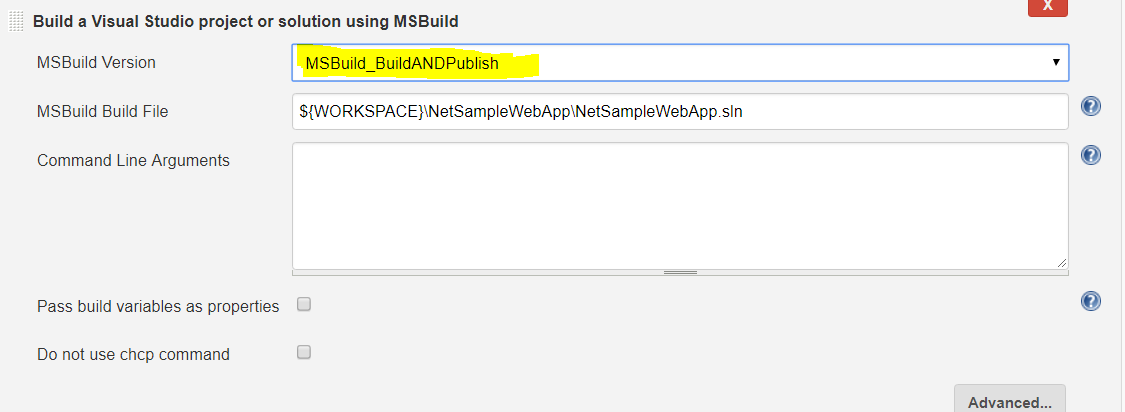
Or select MSBuild_BuildAndPublish if you want to build and then to create the publish files
6. Next step is deploy the application on to azure. If you don’t want to Configure Continuous Deployment then you can skip this step and jump to next step.
- Go to azure and create the app service and then import the publish profile to the solutions and check in the same to GitHub.
-
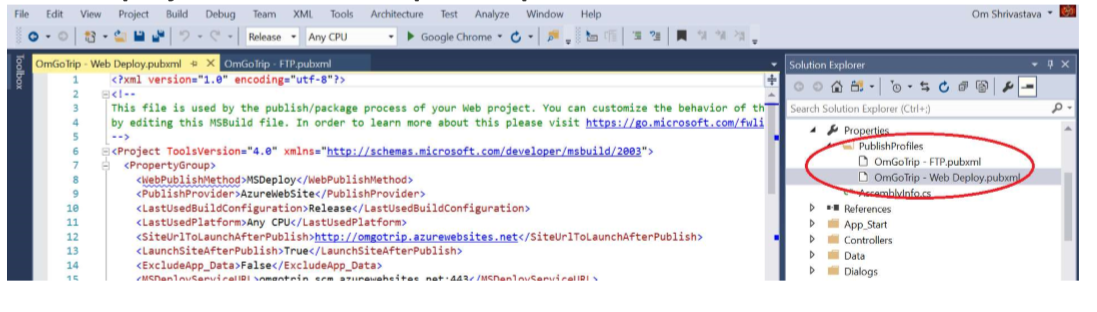
In the Build and Publish step above pass the following as Command Line arguments
/p:PublishProfile="${WORKSPACE}<path to publish profile file> \name.pubxml"

/p:Password=”Password from publish file”

--PublishProfile path PublishProfile = "${WORKSPACE}+ Path of project Properties\PublishProfiles\profilename -Web Deploy.pubxml"
--Password can get from downloaded publish profile
(Open downloaded publish profile using your code editor there you can find the password)
7. Now we have code which is built successfully and then we created the publish files and we have settings (Azure) where we want to deploy the publish files, but how do we transfer files from Jenkins to Azure, that is where FTP comes in
(File Transfer Protocol (FTP) helps you to transfer your from Jenkins to Azure in a secured manner)
How to setup FTP between Azure and Jenkins
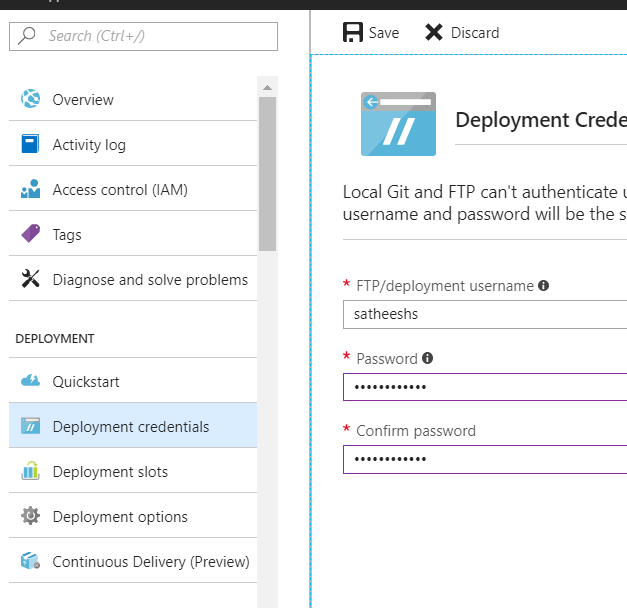
1. Go to Azure portal and open the App Service created above
Click on Deployment Credentials fill as the following
Give the some username and password and remember themJ
Because we need them to configure to Jenkins
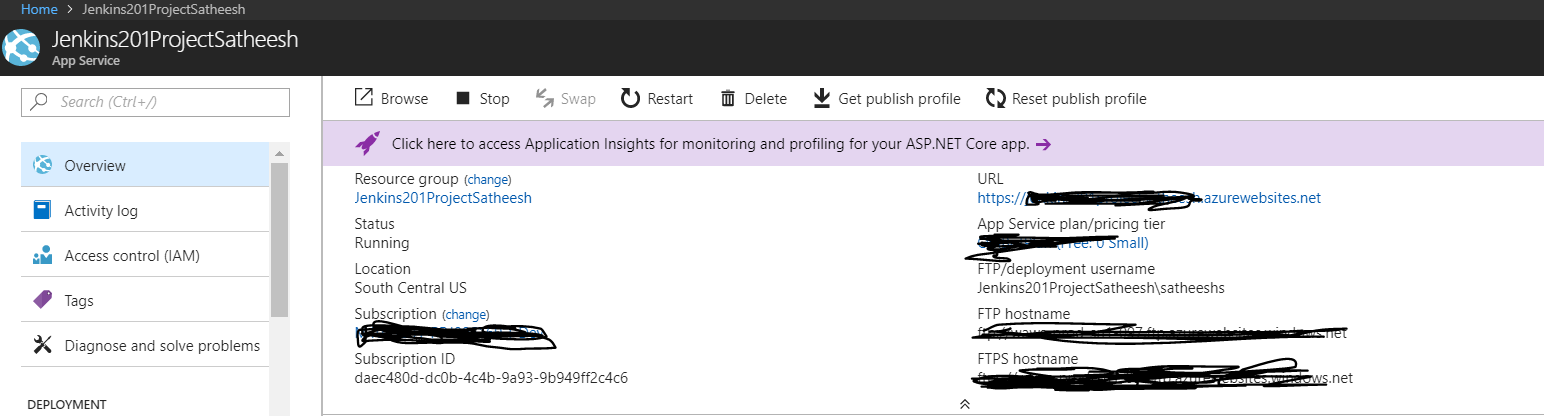
2. Click on Overview from left side pan in azure portal (Same page) and copy the Hostname and Username and save them somewhere.
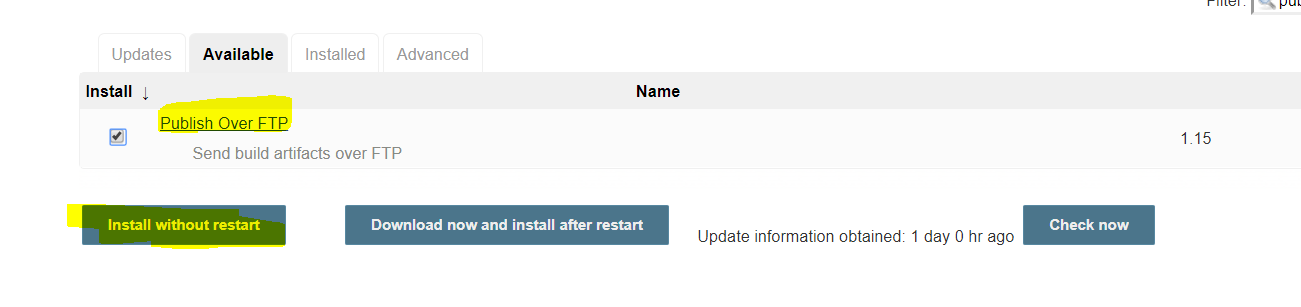
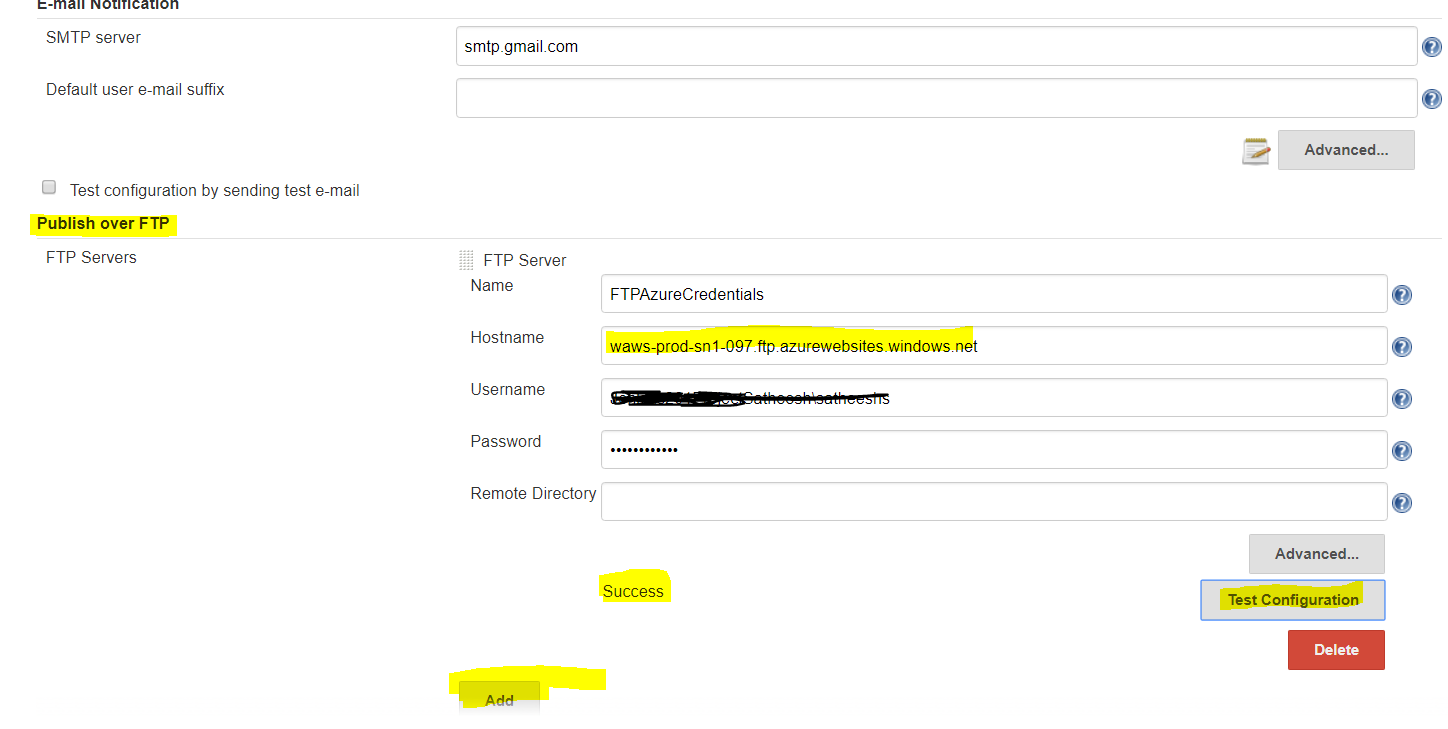
3. Now go to Jenkins and install Publish Over FTP Plugin from available plugins
4. Go to Mange Jenkins à Configure System scroll down at the bottom you should be able to see Publish over FTP , there click on Add fill the relevant details
(Note: Hostname that you copied in the previous step remove “ftp://” like if copied name is ftp://hostname.something.net change it to “hostname.something.net” and paste it to Hostname field below)
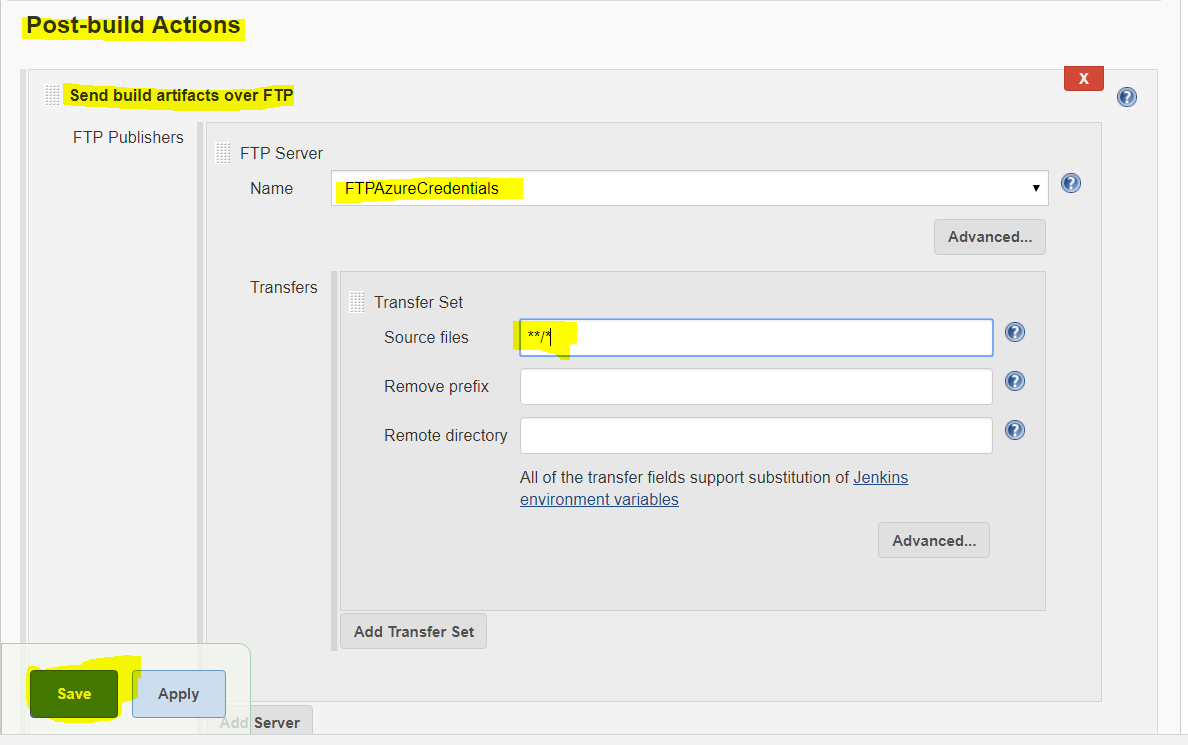
5. Go to Project à configure à click on Post Build
Click on Add Post Build Action and Send Build artifacts over ftp from the dropdown and fill as follows
Name: select the name that you configured in previous step from dropdown
Source Files: Give value as “*/” (which means it transfer all the files generated from Publish step from previous steps) and click on save.
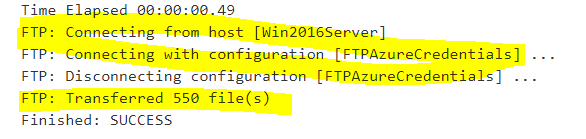
6. Click on Build Now option from left pane and go to console output to see the results, results will be as follows
- asp .net (1) ,
- jenkins (1) ,
- asp dotnet with jenkins (1) ,
- configure jenkins (1) ,
- jenkins with dotnet (1)